Repeat Group Loops
Repeat a group of steps using: while... do... loops & for loops
The Repeat Group Loop feature lets you execute a Group step multiple times according to a set of predefined conditions. A “Loop” must be run on a series of steps which have already been configured as a “group”. To learn more about creating groups, see Groups.
The maximum number of iterations for any loop is 99 iterations.
There are 6 options for when to repeat a group:
- Don’t repeat – Use this option (default) when you don’t want your group of steps to be repeated.
- While element – A While element loop enables you to specify whether or not to run the same set of actions/validations depending on whether or not the specified element exists (or does not exist) on the page. The element can be any DOM object, such as property ID, text, or class. See CONFIGURING A “WHILE ELEMENT” LOOP.
- While element text is – A While element text is loop is similar to the While element loop; however, this loop enables you to specify an expected text value for the specified element. The loop will run only if the specified text exists. See CONFIGURING A “WHILE ELEMENT TEXT IS” LOOP.
- For each item – A For each item loop (i.e. for each loop) allows you to run the same set of actions/validations on similar elements. This is useful to test a list of repeating elements, like a table with multiple rows. See CONFIGURING A “FOR EACH ITEM” LOOP.
- Loop for (i.e. for loop) – A Loop for loop (i.e. a for loop) allows you to run the same set of actions/validations a specified number of times. This value can be set to a number or a parameter with a number value. See CONFIGURING A “LOOP FOR” LOOP.
- Custom – A Custom loop allows you to run the same set of actions/validations depending on a specific value of an element on a page. The loop will run if the value exists. You can enable custom JavaScript code for the condition. See CONFIGURING A “CUSTOM” LOOP.
It is often necessary to keep track of the current iteration you are in while using a loop, for example when iterating through an array. For that purpose, you can use the TESTIM_ITERATOR variable in loops. See USING THE LOOP ITERATOR VARIABLE .
Configuring a “While element” loop
A While element loop enables you to specify whether or not to run the same set of actions/validations depending on whether or not the specified element exists (or does not exist) on the page. The element can be any DOM object, such as property ID, text, or class.
To configure a “While element” loop:
- Choose a group step which contains the steps you want to include in the loop.
Group steps can be identified by the Group icon (a picture of a folder) in the upper left-hand corner of the step.
- Hover over the > (arrow symbol) to the left of that group step.

The action options are displayed.
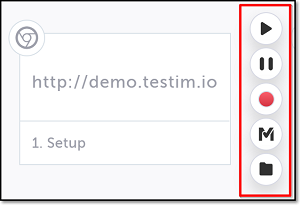
- Click on the Toggle Breakpoint button.
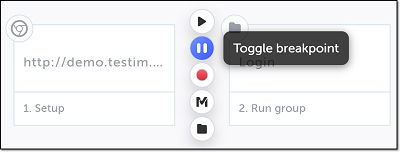
- Click on the Play Scenario button, to run the test until the breakpoint.

- Hover over the group step and then click on the Show Properties () icon.

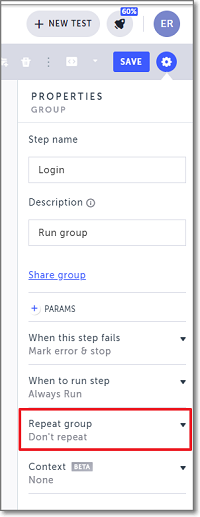
The Group Properties panel opens on the right-hand side.
- In the Group Properties panel, click on Repeat group.
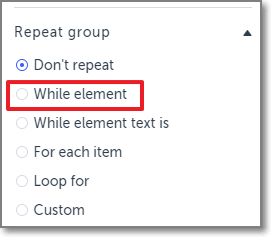
- Select the While element radio button.
- In the AUT window, hover your mouse on the relevant element and then click on it to select it.
The selected element is shown in the Target element box in the Repeat group section of the Group Properties panel.
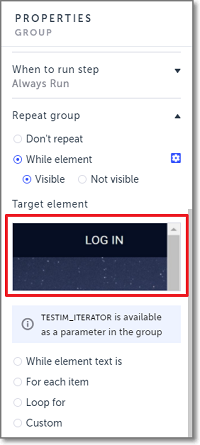
- If you would like to view, replace, or adjust the settings for the selected element, use the procedures described in Modifying the Test Using the Properties Panel.
- Specify the type of Element condition to apply. Options are:
- Visible – the step only runs if the element is visible on the page.
- Not visible – the step runs only if the element is not visible on the page.
- If you would like to adjust the settings for how long Testim checks before declaring a condition to be true or false, use the procedure described in Advanced Condition Settings.
- Click on the Toggle Breakpoint button after to remove the breakpoint.
The loop is added to the step as indicated by the loop icon shown on the group step tile. Whenever you run this test, the loop process will run. To learn how to view the results of the run, see VIEWING LOOP RUN RESULTS.
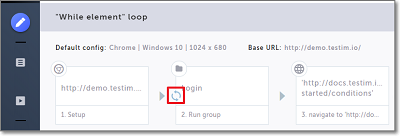
Configuring a “While element text is” loop
A While element text is loop is similar to the While element loop; however, this loop enables you to specify an expected text value for the specified element. The loop will run only if the specified text exists.
To configure a “While element text is” loop:
- Choose a group step which contains the steps you want to include in the loop.
Group steps can be identified by the Group icon (a picture of a folder) in the upper left-hand corner of the step.
- Hover over the > (arrow symbol) to the left of that group step.

The action options are displayed.
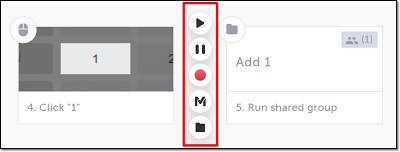
- Click on the Toggle Breakpoint button.
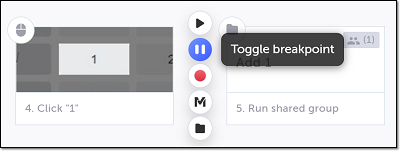
- Click on the Play Scenario button, to run the test until the breakpoint.

- Hover over the group step and then click on the Show Properties () icon.

The Group Properties panel opens on the right-hand side.
- In the Group Properties panel, click on Repeat group.
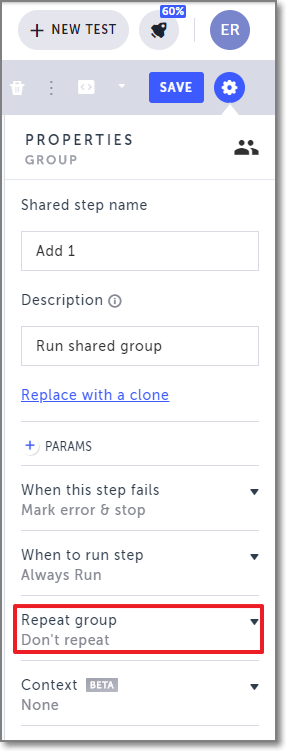
- Select the While element text is radio button.
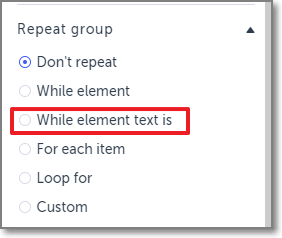
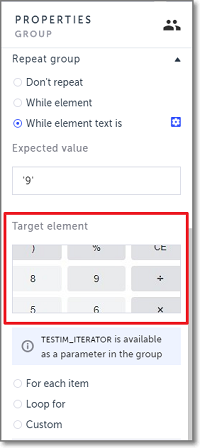
- In the AUT window, hover your mouse on the relevant element and then click on it to select it.
The selected element is shown in the Target element box in the Repeat group section of the Group Properties panel.
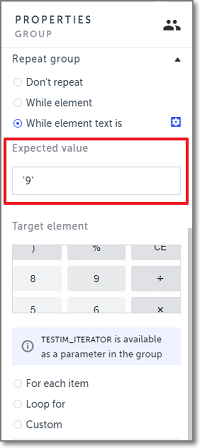
- In the Expected value box, the current value for the selected element is set by default. If you would like to specify a different value, enter the value in the Expected value box. If you would like to set a range of values, enter a Regex expression, a short JS expression, or a parameter.
- If you would like to view, replace, or adjust the settings for the selected element, use the procedures described in Modifying the Test Using the Properties Panel.
- If you would like to adjust the settings for how long Testim checks before declaring a condition to be true or false, use the procedure described in Advanced Condition Settings.
- Click on the Toggle Breakpoint button after to remove the breakpoint.
The loop is added to the step as indicated by the loop icon shown on the group step tile. Whenever you run this test, the loop process will run. To learn how to view the results of the run, see VIEWING LOOP RUN RESULTS.

Configuring a “For each item” loop
A For each item loop (i.e. for each loop) allows you to run the same set of actions/validations on similar elements. This is useful to test a list of repeating elements, like a table with multiple rows.
To configure a “For each item” loop:
- Choose a group step which contains the steps you want to include in the loop.
Group steps can be identified by the Group icon (a picture of a folder) in the upper left-hand corner of the step.
- Hover over the > (arrow symbol) to the left of that group step.

The action options are displayed.
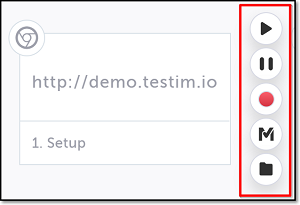
- Click on the Toggle Breakpoint button.
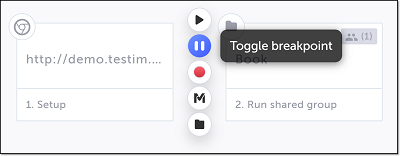
- Click on the Play Scenario button, to run the test until the breakpoint.

- Hover over the group step and then click on the Show Properties () icon.

The Group Properties panel opens on the right-hand side.
- In the Group Properties panel, click on Repeat group.
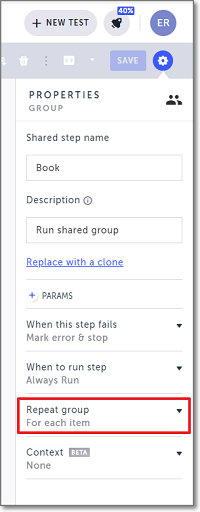
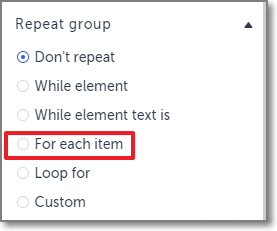
- Select the For each item radio button.
- In the AUT window, using your mouse, select the first repeating relevant element (for example, the first cell of a table) to select it.
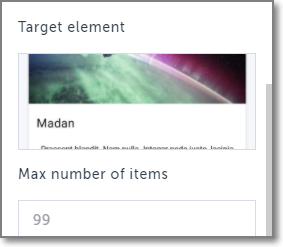
The selected element is shown in the Target element box in the Group Properties panel, and the Max number of items field opens showing the default value as 99, meaning that this loop will run for up to 99 similar items. If you would like to set a lower limit, you may optionally enter a smaller value for the maximum number of items.
- If you would like to view, replace, or adjust the settings for the selected element, use the procedures described in Modifying the Test Using the Properties Panel.
- If you would like to adjust the settings for how long Testim checks before declaring a condition to be true or false, use the procedure described in Advanced Condition Settings.
- Click on the Toggle Breakpoint button after to remove the breakpoint.
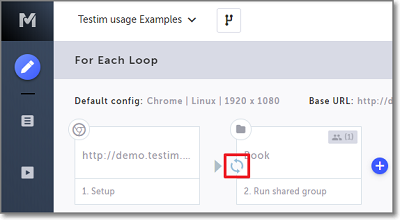
The loop is added to the step as indicated by the loop icon shown on the group step tile. Whenever you run this test, the loop process will run through each of the items similar to the item you selected. To learn how to view the results of the run, see VIEWING LOOP RUN RESULTS.
Try it yourself
Click here to open a sample test which includes a For each item loop. Try running the test and adjusting the loop configuration.
Configuring a “Loop for” Loop
A Loop for loop (i.e. a for loop) allows you to run the same set of actions/validations a specified number of times. This value can be set to a number or a parameter with a number value.
To configure a “Loop for” loop: where the value is a number:
- Choose a group step which contains the steps you want to include in the loop.
Group steps can be identified by the Group icon (a picture of a folder) in the upper left-hand corner of the step.
- Hover over the group step and then click on the Show Properties () icon. The Group Properties panel opens on the right-hand side.
- In the Group Properties panel, click on Repeat group.
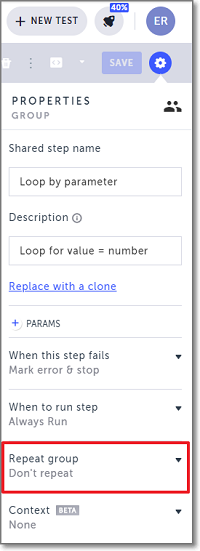
- Select the Loop for radio button. The Value to loop for field opens.
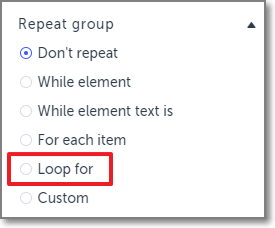
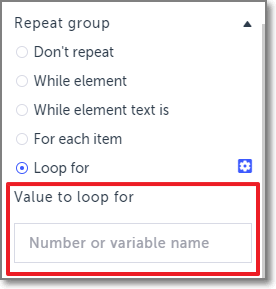
- Enter a value for the number of times you want these steps to be looped through.
The maximum number of iterations allowed is 99.
- If you would like to adjust the settings for how long Testim checks before declaring a condition to be true or false, use the procedure described in Advanced Condition Settings.
The loop is added to the step as indicated by the loop icon shown on the group step tile. Whenever you run this test, the loop process will run. To learn how to view the results of the run, see VIEWING LOOP RUN RESULTS.
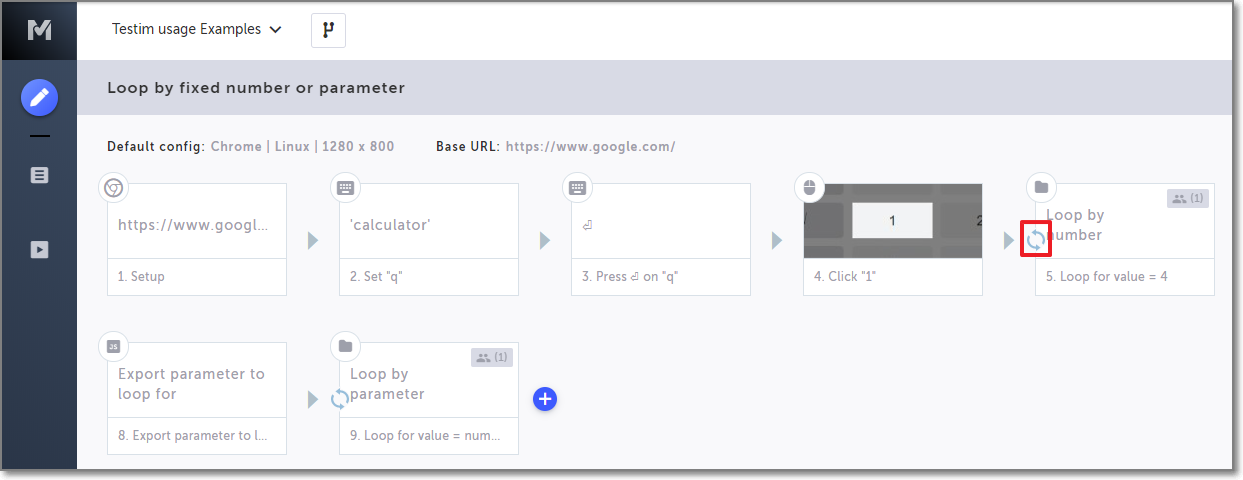
To configure a “Loop for” loop: where the value is a parameter:
- Choose a group step which contains the steps you want to include in the loop.
Group steps can be identified by the Group icon (a picture of a folder).
- Hover over the arrow to the left of the group.

The action options are displayed.
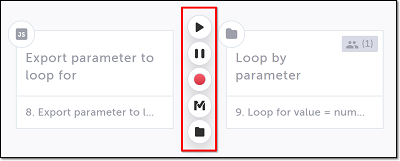
- Click on the "M" (Testim predefined steps).
The Predefined steps menu opens.
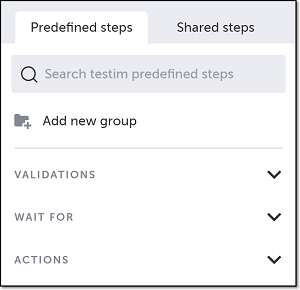
- Click on Actions.
The Actions section expands.
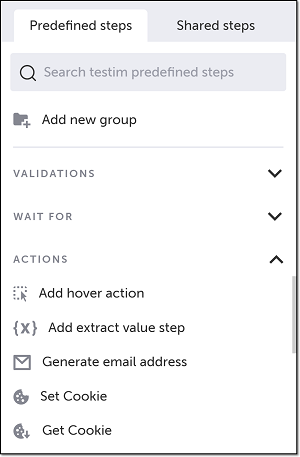
- Scroll down through the menu and select Add custom action.
Alternatively, you can use the search box at the top of the menu to search for Add custom action.
The Add Step window opens.
For more information about adding custom actions, see Creating a Custom Action.
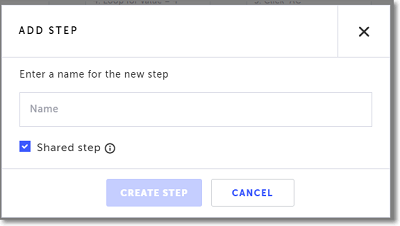
- In the Enter a name for the new step field, enter a (meaningful) name for this step.
- If this is a shared step (to be made available to reuse in this and other tests), keep the box next to Shared step selected. This is the default. Otherwise, deselect it.
For more information about shared steps, see Reuse. - Click Create Step.
The editor opens, and the Custom Action Properties panel opens on the right-hand side.
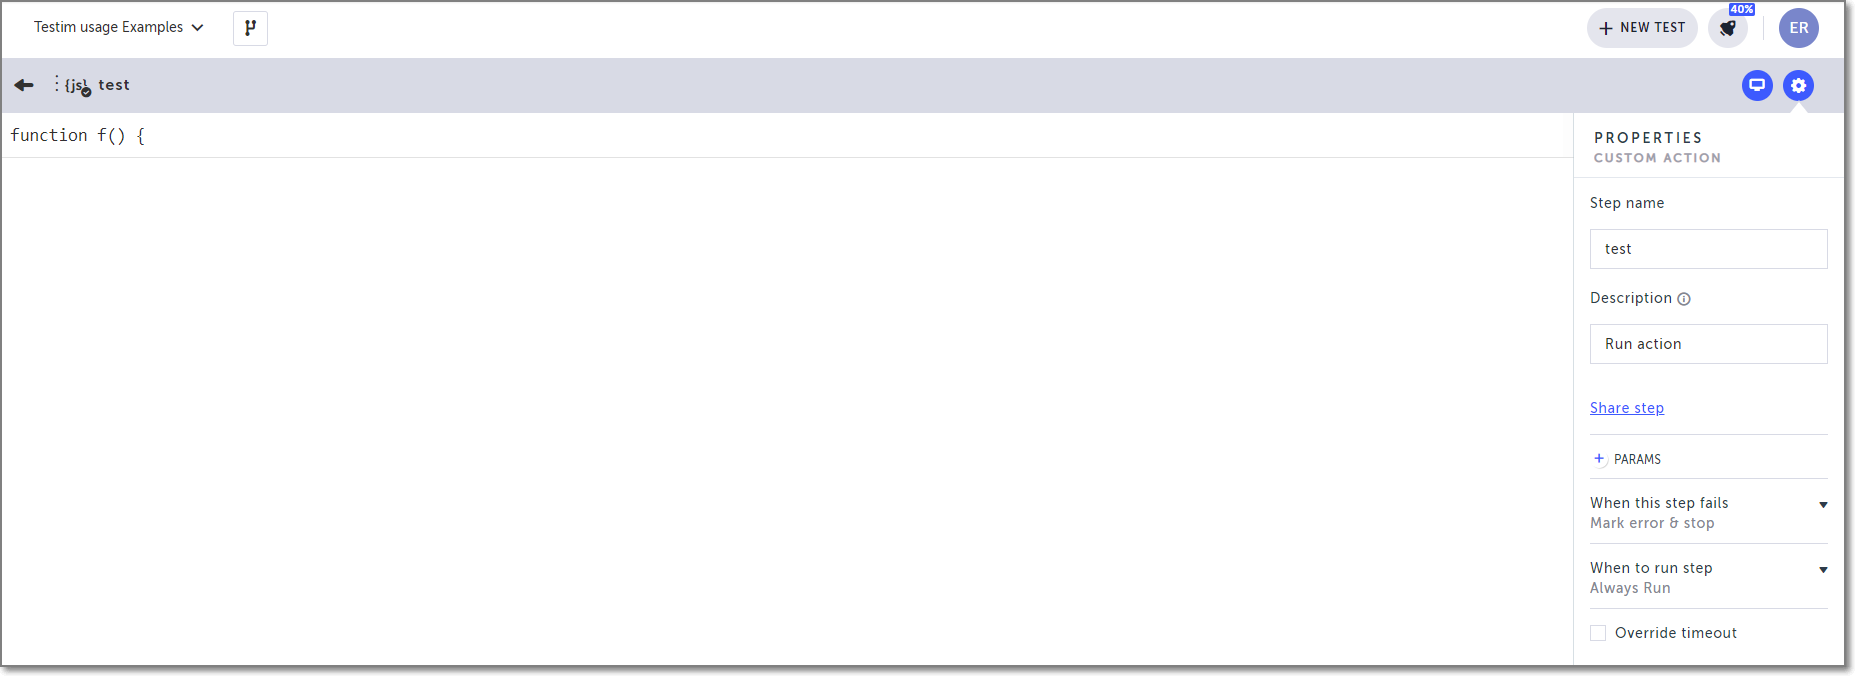
- Enter the appropriate code to pass the parameter you are exporting to the group step. (For example: exportsTest.number = 2;) For more information about exporting parameters, see Exports Parameters.
Note: The maximum number of iterations allowed is 99. - Optionally edit the properties in the Custom Action Properties panel.
- Description - Change the description of the step.
- +PARAMS - Add JavaScript or HTML parameters. For more information, see Parameters in custom JavaScript steps.
- When this step fails - Specify what should happen if the step has failed.
- When to run step - Specify when this step should be included in the test. Conditions may include the existence of an element/element text, or a custom JS function.
- Override timeout - Keep waiting until the refresh occurs even after timeout.
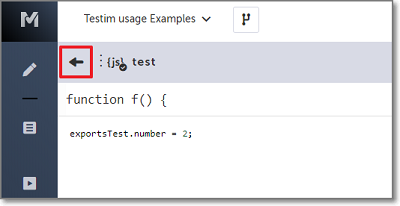
- Click the back arrow to return to the main editor window.
- Hover over the group step and then click on the Show Properties () icon. The Group Properties panel opens on the right-hand side.
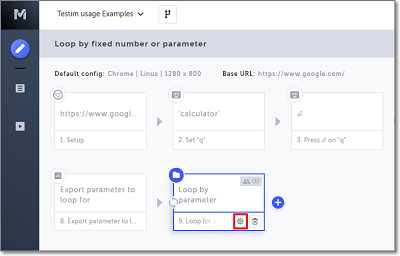
- In the Group Properties panel, click on Repeat group.
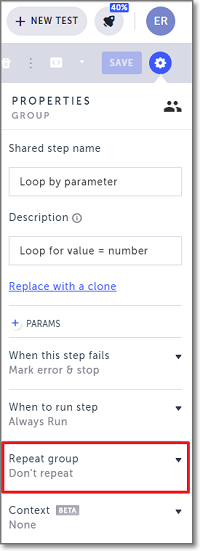
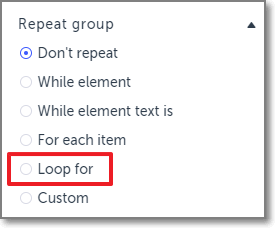
- Select the Loop for radio button. The Value to loop for field opens.
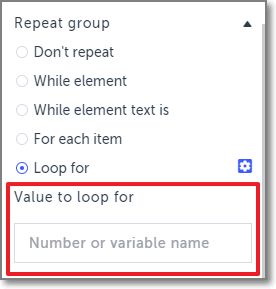
- Enter the parameter you used in Step 7 (above). (For example, number).
- If you would like to adjust the settings for how long Testim checks before declaring a condition to be true or false, use the procedure described in Advanced Condition Settings.
The loop is added to the step as indicated by the loop icon shown on the group step tile. Whenever you run this test, the loop process will run. To learn how to view the results of the run, see VIEWING LOOP RUN RESULTS.
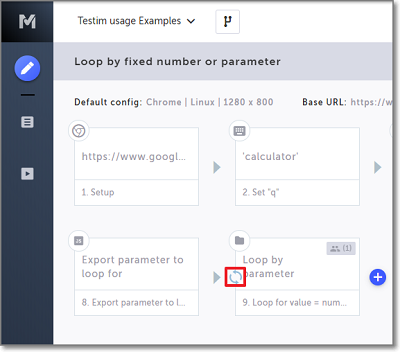
Try it yourself
Click here to open a sample test which includes a “Loop by Number” for loop and a “Loop by Parameter” for loop. Try running the test and practice adjusting the configuration.
Configuring a “Custom” loop
There are times that you may want to create loops that are based on more than just validating that an element is visible or that specific text exists. You may want to check an element’s value or create more complex conditions. The Custom loop option enables you to do this by creating conditions for your loop defined as JavaScript steps.
For example, if you would like to check the URL in order to identify whether or not you are on the login page, you could use the following custom condition in your loop:
return loginButton.innerText === 'LOG IN';
You can also define HTML or JavaScript parameters and then refer to these parameters in the step. For example, you can select an HTML element such as a button and then create a condition to check the text on that button.
To configure a “Custom" loop:
- Choose a group step which contains the steps you want to include in the loop.
Group steps can be identified by the Group icon (a picture of a folder) in the upper left-hand corner of the step.
If you will be defining an HTML element as a parameter in Step 6 (below), you first must open your AUT by doing the following:
- Hover over the > (arrow symbol) to the left of your group step.
- Click on the Toggle Breakpoint button.
- Click on the Play Scenario button, to run the test until the breakpoint.
- Hover over the group step and then click on the Show Properties () icon. The Group Properties panel opens on the right-hand side.
- In the Group Properties panel, click on Repeat group.
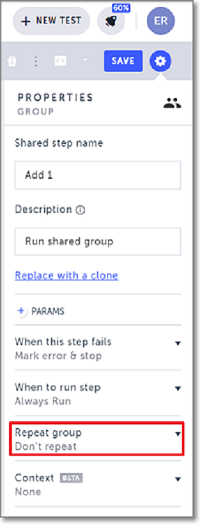
- Select the Custom radio button.
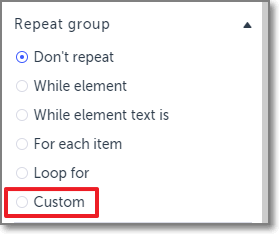
- The Set condition window opens.

- If you would like to use parameters for your custom loop, define the parameters as follows:
- In the right-hand pane, click the + PARAMS button.
- JS parameter: If you would like to add a JavaScript parameter, select JS from the dropdown list and type in the JavaScript parameter.
- HTML parameter: If you would like to define an HTML element as a parameter, select HTML from the dropdown list. The browser opens, displaying the relevant webpage for this step. Do the following:
- In the AUT window, hover your mouse on the relevant element and then click on it to select it. The selected element is shown in the Target element box in the Properties panel.
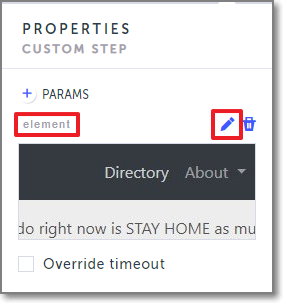
- The selected element is automatically named "param" or “element” (depending on whether you chose a JS parameter or HTML element parameter). To assign a relevant name to the parameter/element, click on the edit icon and enter the desired name.
- In the function text box, type in the desired JavaScript condition. If you have defined parameters, you can refer to those parameters in your JavaScript condition.
If you are using DOM selectors other than HTML parameters (e.g. jQuery), then empty arrays are truthy, so you need to use $().length instead of $().
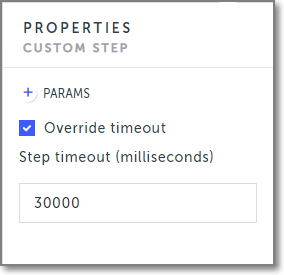
- If you would like to override the default timeout setting (30000 ms), click on the Override timeout button in the Custom Step Properties pane, and enter the desired timeout limit.
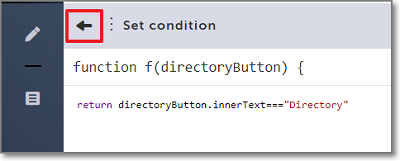
- Click the back arrow to return to the main Editor window.
- If you would like to adjust the settings for how long Testim checks before declaring a condition to be true or false, use the procedure described in Advanced Condition Settings.
If you opened your AUT to define an HTML element as a parameter, click on the Toggle Breakpoint button before your group step to remove the breakpoint.
The loop is added to the step as indicated by the loop icon shown on the group step tile. Whenever you run this test, the loop process will run. To learn how to view the results of the run, see VIEWING LOOP RUN RESULTS.

Using the Loop Iterator Parameter
TESTIM_ITERATOR is an out-of-the-box parameter that allows you to keep track of and use the value of the current loop iteration. Each time a loop is run, the value of TESTIM_ITERATOR increases by one. The following are some examples of how you can use TESTIM_ITERATOR.
- Example 1 – using the value of the current loop iteration in a step of a test
- Example 2 – designate the number of times to repeat a loop by using the value of the current loop iteration in the conditions of a loop step
Example 1
You can use TESTIM_ITERATOR in a step of your test that is within a loop. The value of the current iteration of the loop will be used when the step is run.
The following procedure explains how to use TESTIM_ITERATOR for text validation in a step within a “For each item” loop.
To use the value of the current loop iteration in a step:
- Choose a group step which contains the step for which you would like to use the TESTIM_ITERATOR.
Group steps can be identified by the Group icon (a picture of a folder).
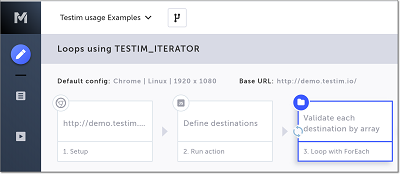
- Double-click on the group tile to open the group.
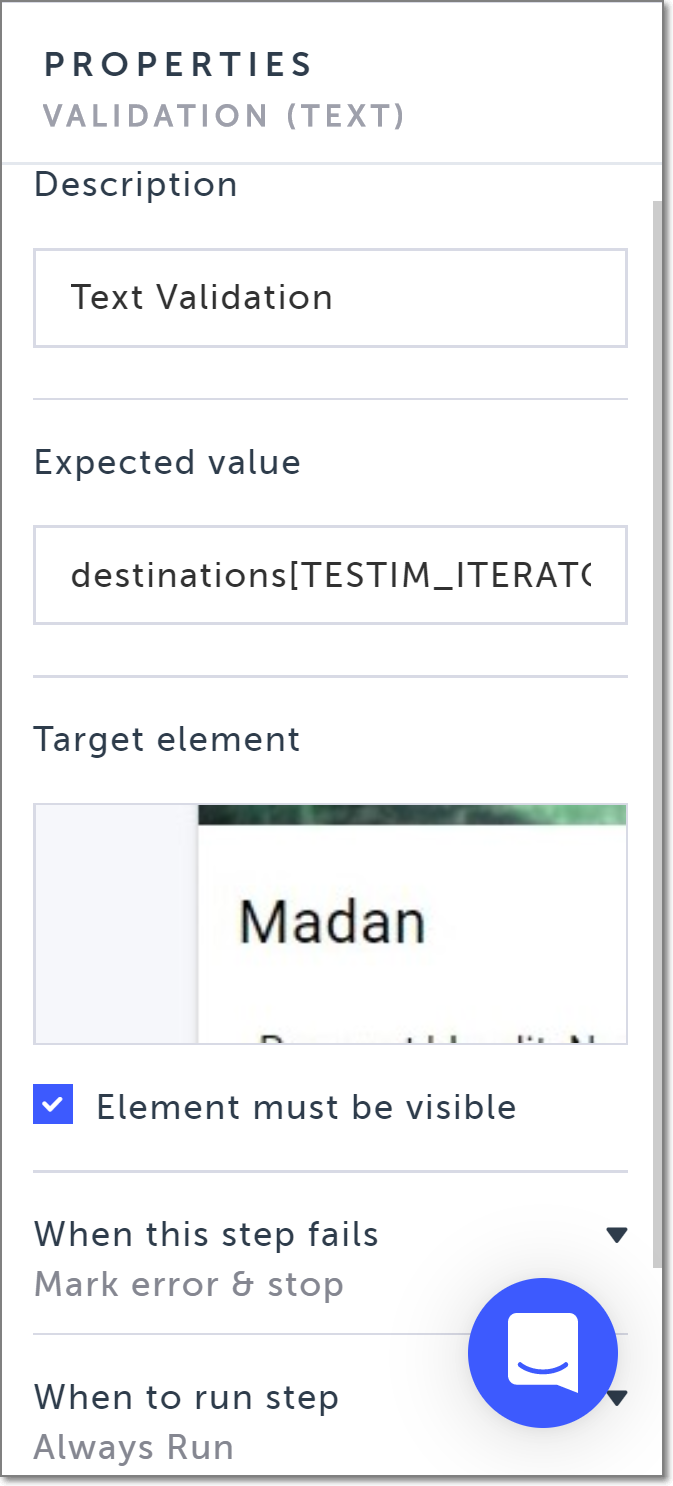
- Hover over a step where you want to use the iteration value (e.g. text validation), and then click on the Show Properties () icon. The Properties panel opens on the right-hand side.
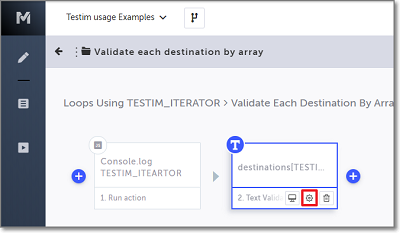
- Edit the properties based on the type of loop you are editing, including the property based on the loop iterator. (See the explanation of configuring loops above.) For example, if you are editing a “For each item” loop, enter “<array_name>[TESTIM_ITERATOR]” in the Expected value field.
- Click the back arrow to return to the main Editor window.
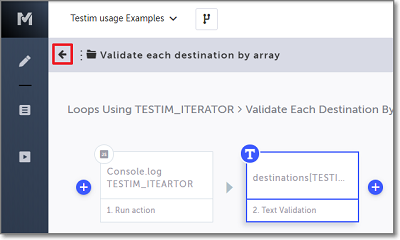
Whenever you run this test, the loop process will use the value of the loop iteration wherever you indicated using “TESTIM_ITERATOR” in a step. To learn how to view the results of the run, see VIEWING LOOP RUN RESULTS.
Example 2
You can use TESTIM_ITERATOR to define the conditions of a loop step, which will determine the number of times to repeat the loop.
The following procedure explains how to run a test that uses TESTIM_ITERATOR and the length of an array to set the loop to run once for each array element.
To create a loop condition using an array and TESTIM_ITERATOR:
- Choose a group step which contains the steps you want to include in the loop.
Group steps can be identified by the Group icon (a picture of a folder).
- Hover over the arrow to the left of the group.

The action options are displayed.
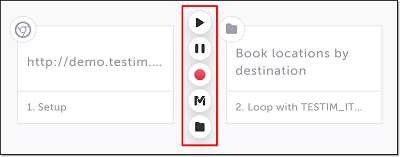
- Click on the "M" (Testim predefined steps).
The Predefined steps menu opens.
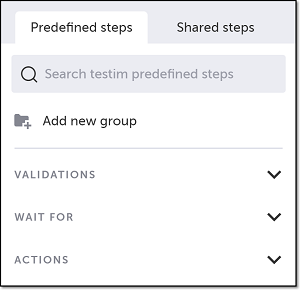
- Click on Actions.
The Actions section expands.
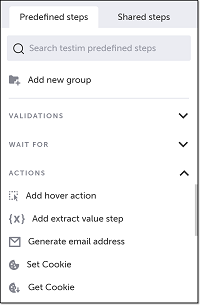
- Scroll down through the menu and select Add custom action.
Alternatively, you can use the search box at the top of the menu to search for Add custom action.
For more information about adding custom actions, see Creating a Custom Action.
The Add Step window opens.
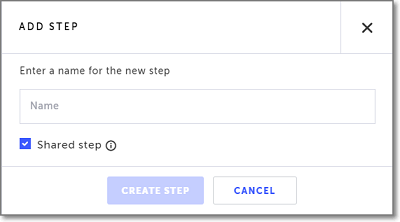
- In the Enter a name for the new step field, enter a (meaningful) name for this step.
- If this is a shared step (to be made available to reuse in this and other tests), keep the box next to Shared step selected. This is the default. Otherwise, deselect it.
For more information about shared steps, see Reuse. - Click Create Step.
The condition editor opens, and the Custom Action Properties panel opens on the right-hand side.

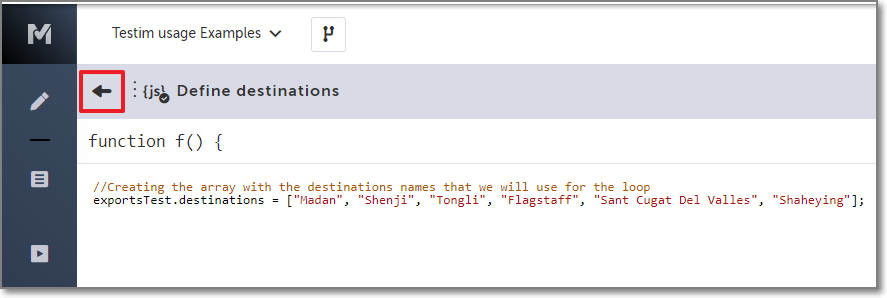
- Enter the appropriate code to create your array. (For example: exportsTest.destinations = ["Madan", "Shenji", "Tongli", "Flagstaff", "Sant Cugat Del Valles", "Shaheying"];) For more information about exporting parameters, see Exports Parameters.
- Optionally edit the properties in the Custom Action Properties panel.
- Description - Change the description of the step.
- +PARAMS - Add JavaScript or HTML parameters. For more information, see Parameters in custom JavaScript steps
- When this step fails - Specify what should happen if the step has failed.
- When to run step - Specify when this step should be included in the test. Conditions may include the existence of an element/element text, or a custom JS function.
- Override timeout - Keep waiting until the refresh occurs even after timeout.
- Click the back arrow to return to the main Editor window.
- Hover over the group step and then click on the Show Properties () icon. The Group Properties panel opens on the right-hand side.
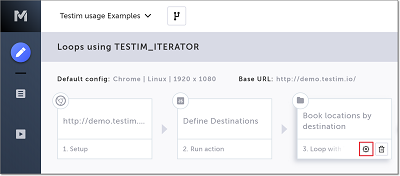
- In the Group Properties panel, click on Repeat group.
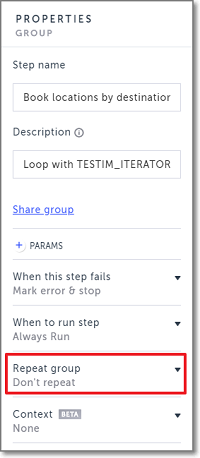
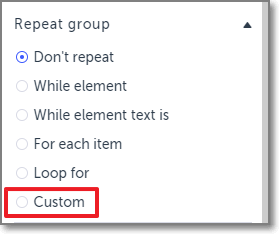
- Select the Custom radio button. The Set condition window opens.

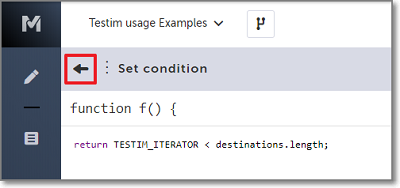
- In the function text box, type in the desired JavaScript condition using TESTIM_ITERATOR based on the array you just created, for example “return TESTIM_ITERATOR < destinations.length;”.
If you have defined parameters, you can refer to those parameters in your JavaScript condition.
If you are using DOM selectors other than HTML parameters (e.g. jQuery), then empty arrays are truthy, so you need to use $().length instead of $().
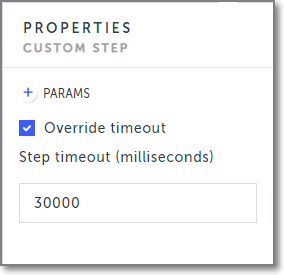
- If you would like to override the default timeout setting (30000 ms), click on the Override timeout button in the Custom Step Properties pane, and enter the desired timeout limit.
- Click the back arrow to return to the main Editor window.
- The loop is added to the step as indicated by the loop icon shown on the group step tile. Whenever you run this test, the loop process will loop over the contents in the array using the value of TESTIM_ITERATOR. To learn how to view the results of the run, see VIEWING LOOP RUN RESULTS.
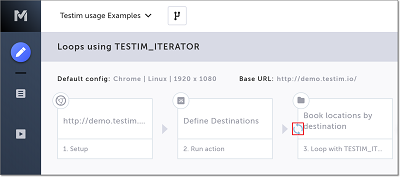
Try it yourself
Click here to open a sample test in which the “Loop iterator” is used. Try running the test, and practice adjusting the configuration.
Viewing Loop Run Results
After running your test, the number of iterations the loop step was run is shown within the loop icon in the loop step.
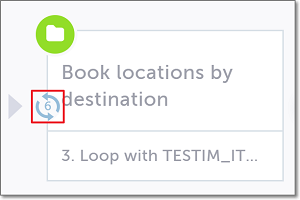
You can go through each iteration and look at each of the results separately.
There are two methods for viewing loop results:
- In the properties pane for the group step, or
- By opening up the group step and viewing the iterations within the group. If one of the iterations failed, then when you open the group, you will be taken directly to the failed iteration.
To view Run Results from the group’s properties:
- Hover over the group step and then click on the Show Properties () icon. The Group Properties panel opens on the right-hand side.
- In the Group Properties panel, click on the iteration you would like to view. The group steps for the specified iteration are shown in the editor.
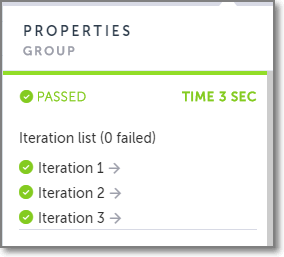
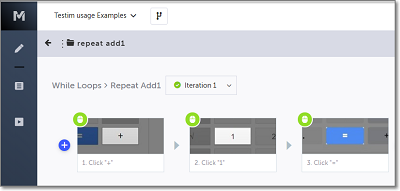
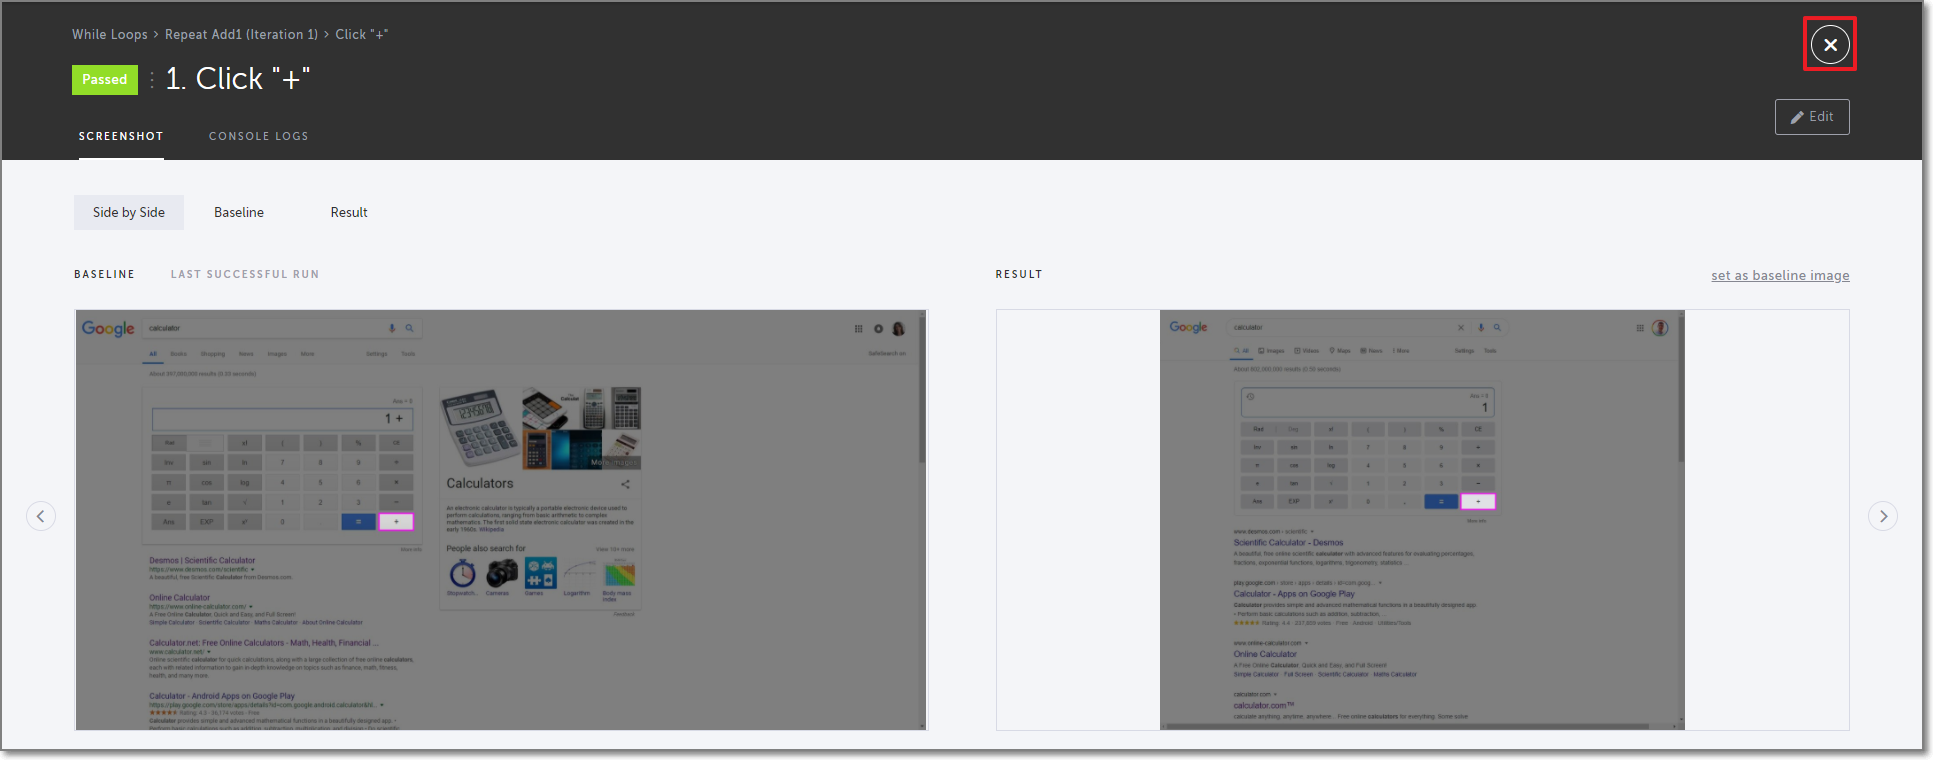
- Hover over the step you would like to view, and click on the Show Screenshot icon. The details for the specified step are shown.
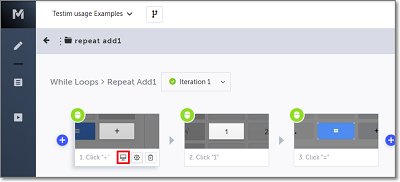
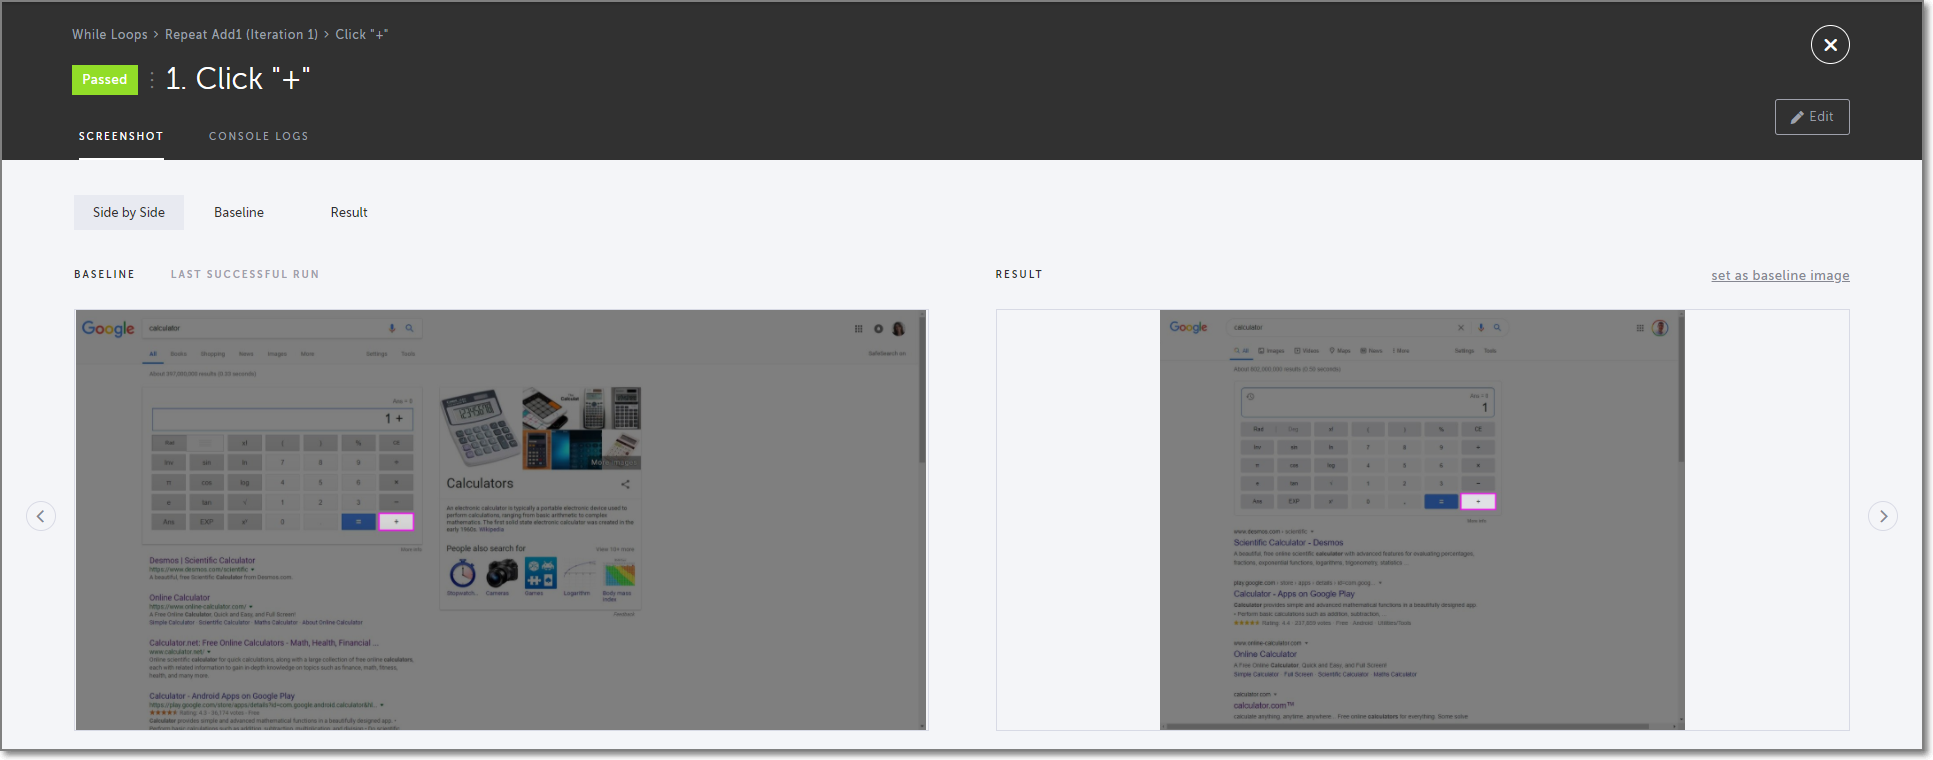
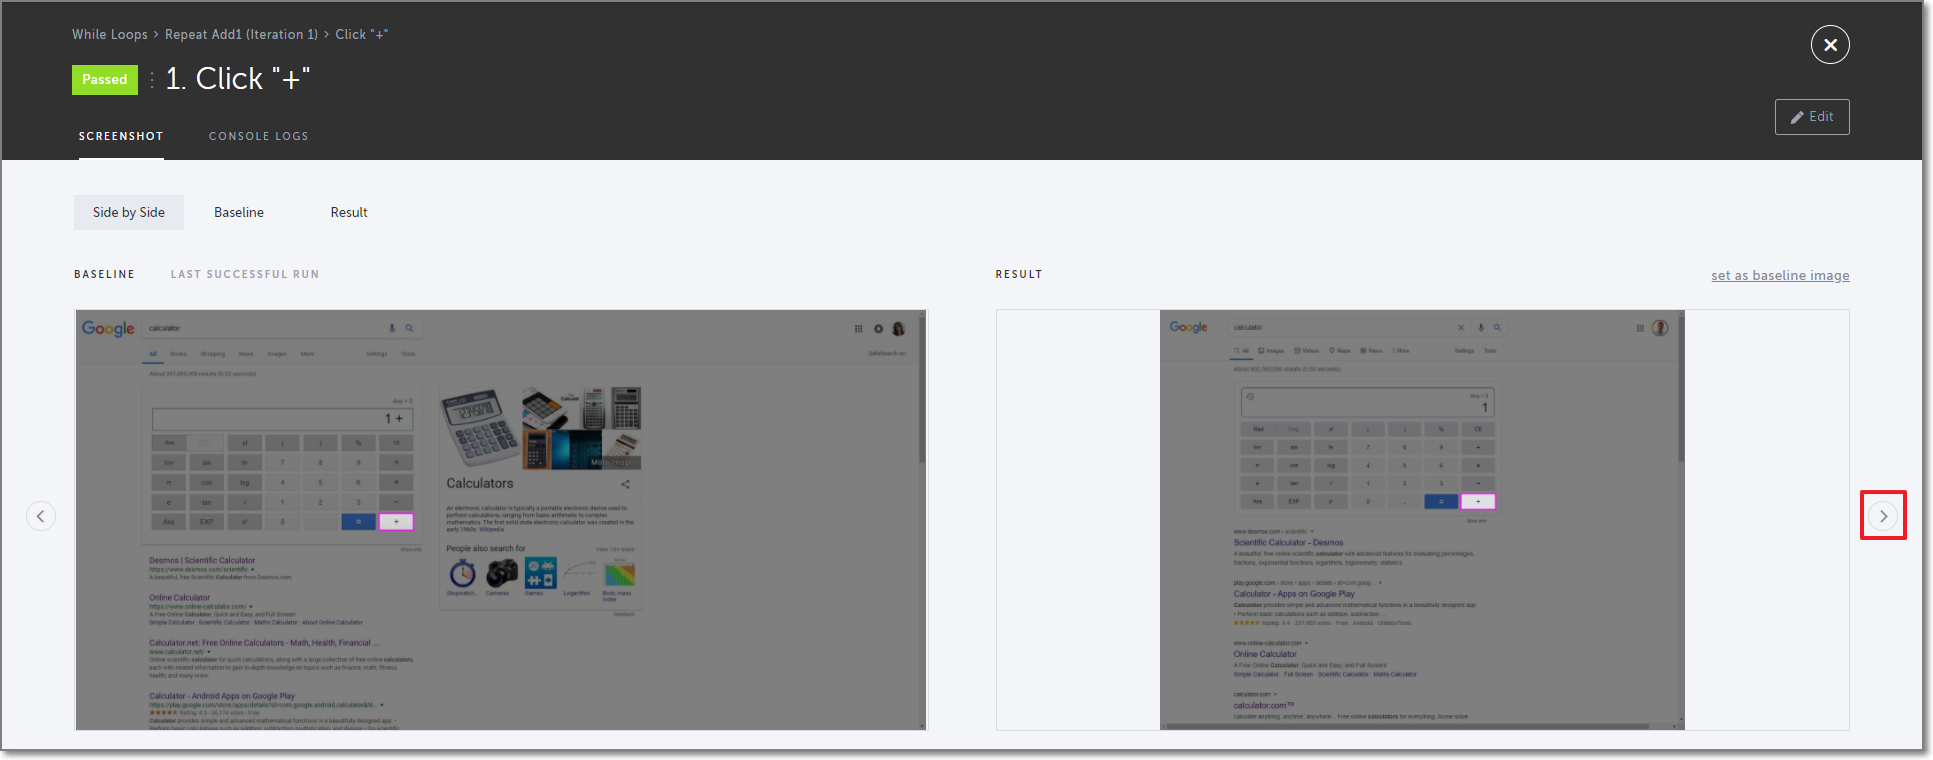
- Click the right arrow to view the results of the next step in that group.
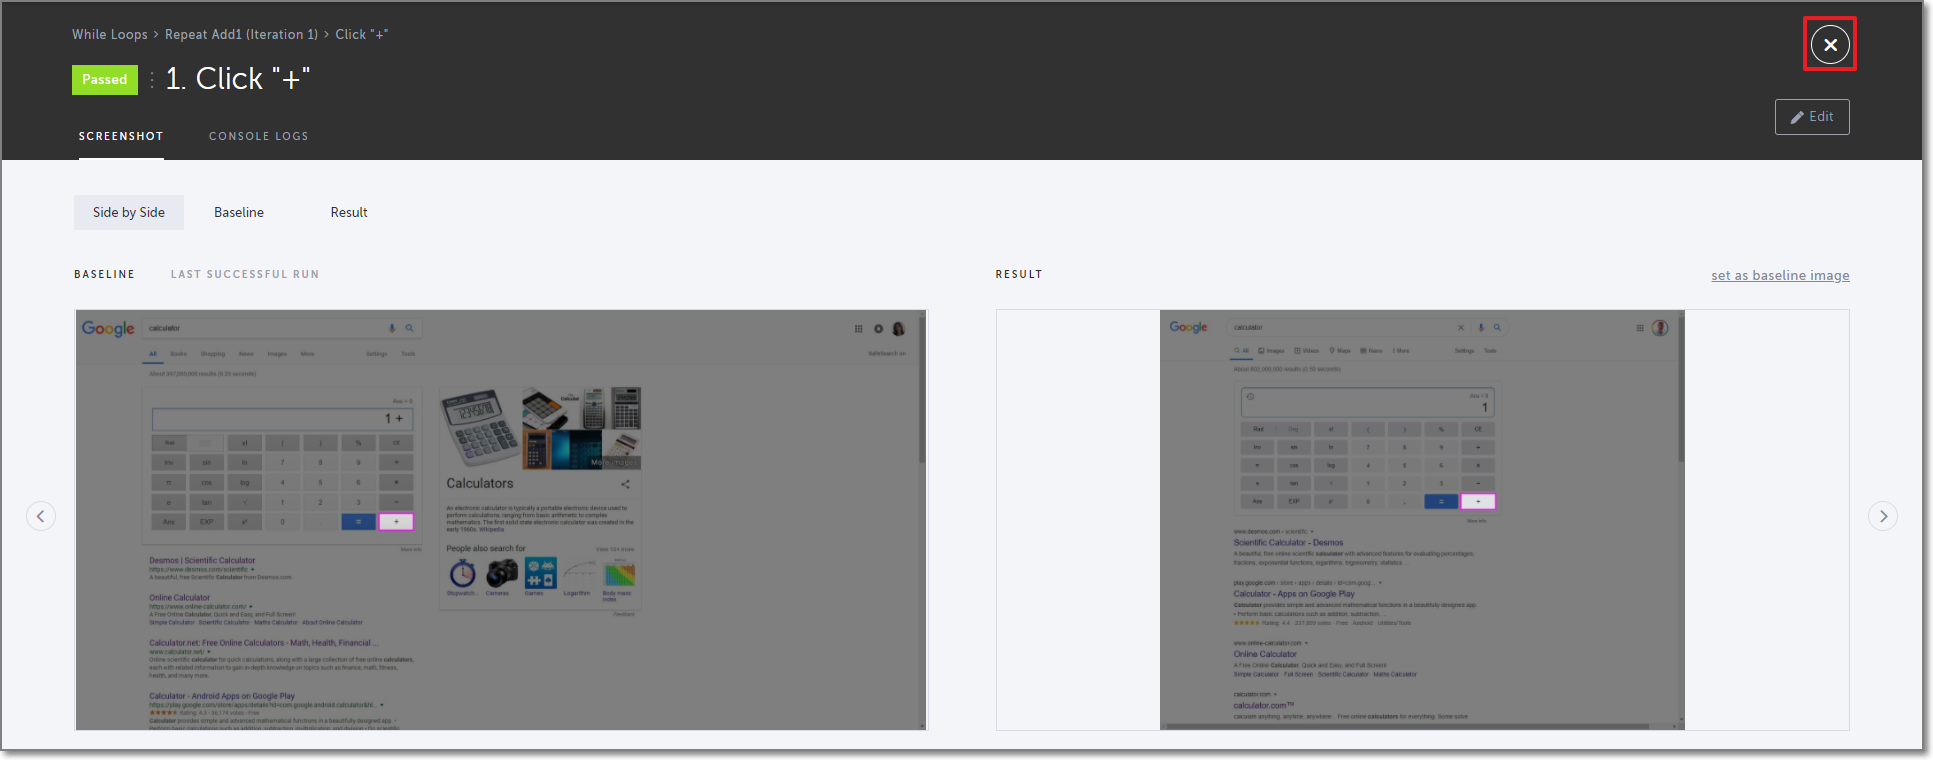
- Click the X to return to the previous screen.
To view Run Results from inside the group:
- Double-click on the group tile to open the group.
- Click on the Iteration dropdown list, and choose the iteration you would like to view.
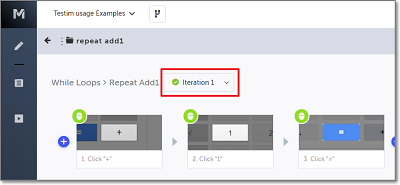
- Hover over the step you would like to view, and click on the Show Screenshot icon. The details for the specified step are shown.
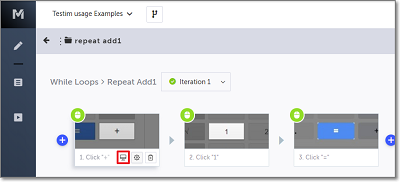
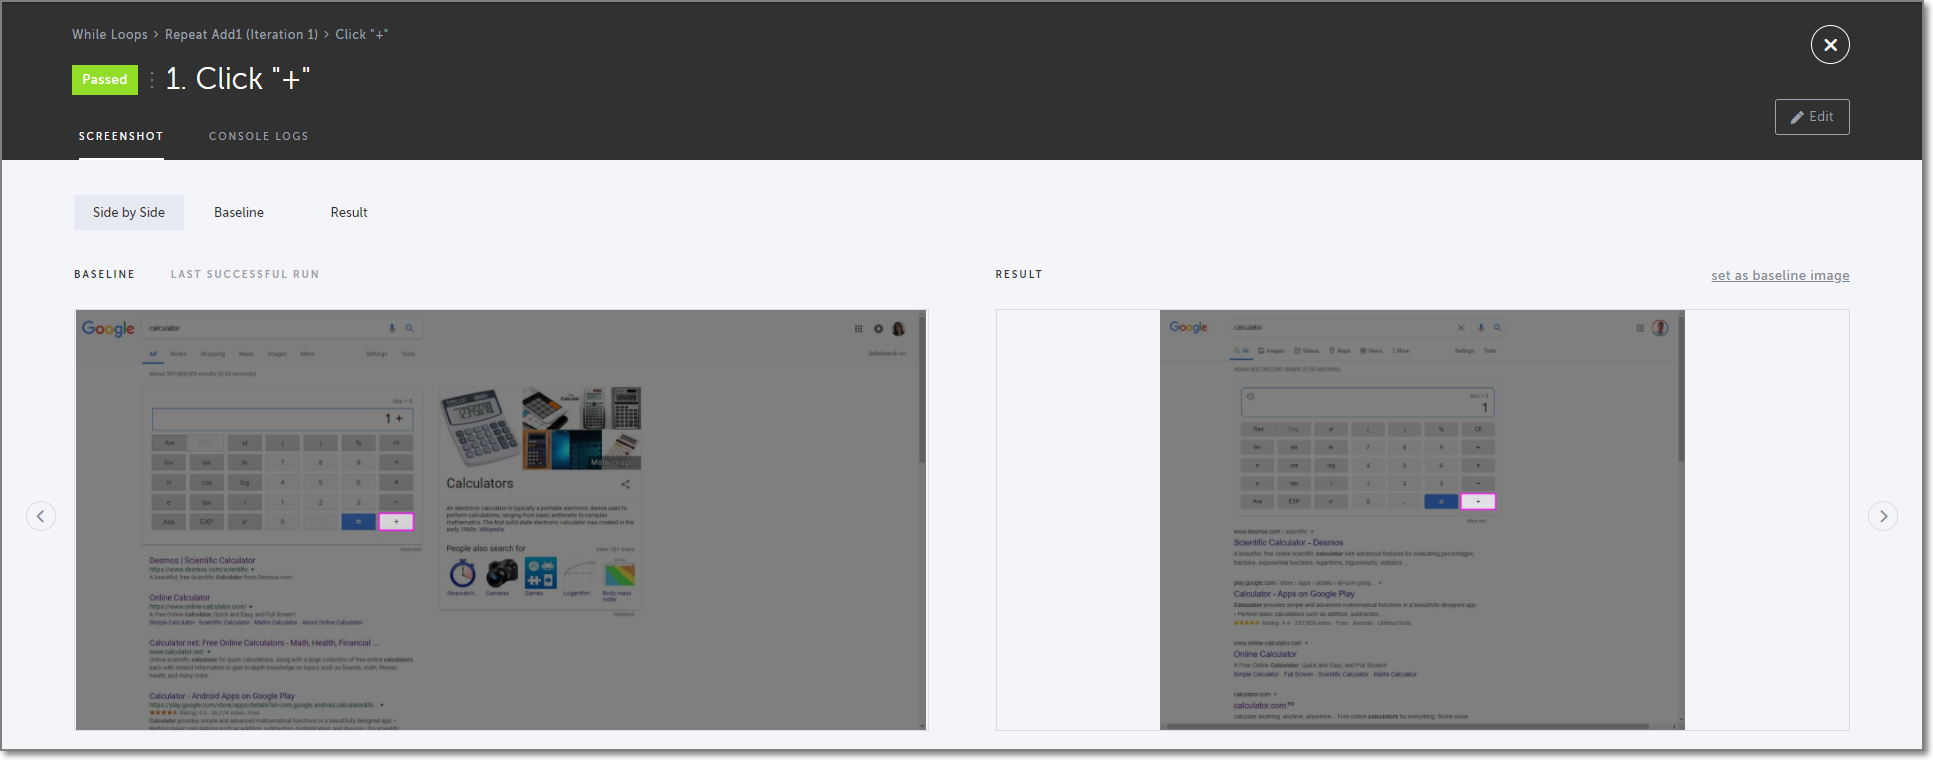
- Click the right arrow to view the results of the next step in that group.
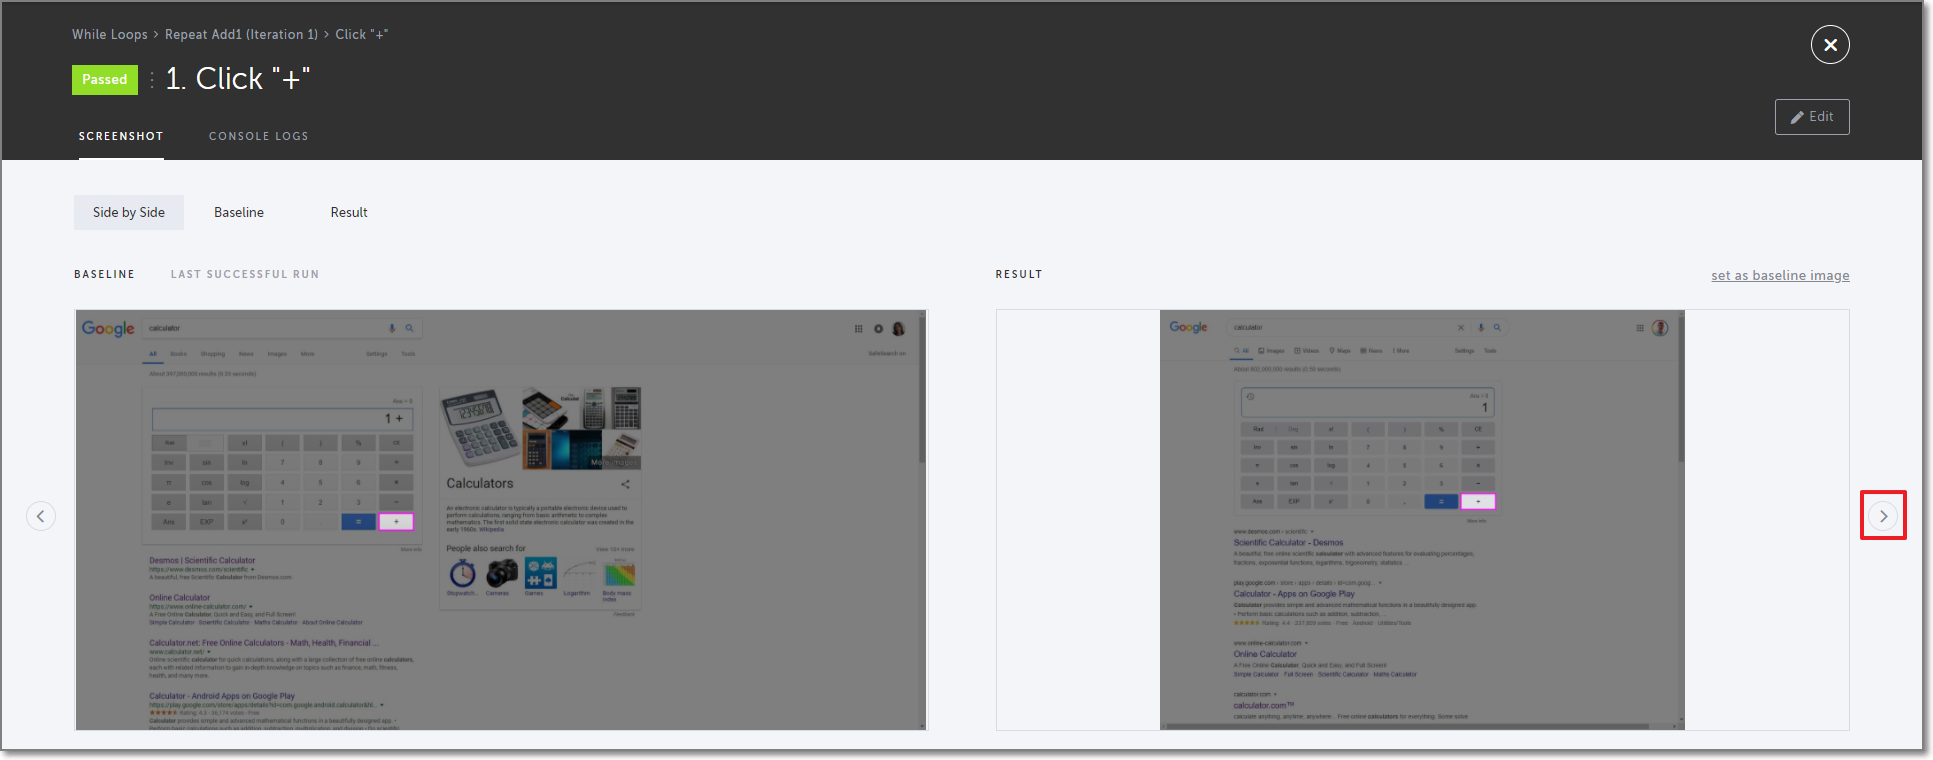
- Click the X to return to the previous screen.
Updated 10 months ago
